Posts Tagged DIY Beauty
Blackheads and Baking Soda
Posted by MarleyJustine in DIY, DIY Beauty, Tips & Tricks on August 12, 2013
Nobody likes blackheads. Unfortunately, blackheads are common, especially if you have oily skin. Of course, there are a number of products available to help combat blackheads – you’ve probably heard of them, maybe you have tried them and maybe you have even had success with them. If you are looking for a budget-friendly way to help combat blackheads, or if you simply enjoy DIY home remedies, try beating blackheads with baking soda!
Mix 2.5 tbsp of baking soda with 2-2.5 tbsp water. The two should form a paste. If your mixture is slightly runny, that is okay. However, if you wish to thicken it, simply add more baking soda.
Apply the mixture to the areas of your face where blackheads are present and gently massage using your fingers for about two to three minutes. Rinse your face with warm water and pat dry.
“My Feet Smell Like a Margarita”: DIY Lime Sugar Scrub
Posted by MarleyJustine in DIY, DIY Beauty, DIY Sugar Scrubs on July 29, 2013
Hey everyone,
I hope you all had a fabulous weekend. I think my weekend could have been more productive, but I won’t complain. This will be my last post until this Friday (2 August). Until then, I will be studying for an exam in comparative criminal justice, which is this Thursday. Wish me luck!
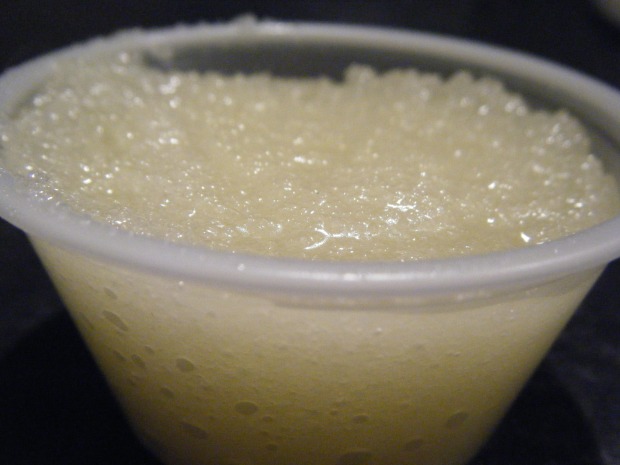
Yesterday I decided to treat myself to a DIY sugar scrub. I decided to do this DIY lime sugar scrub because I thought it was a perfect match for the beautiful summer weather.
While I have nicknamed this sugar scrub “Margarita Feet” it is not exclusively for feet. The first time I ever made this I was giving myself a pedicure and I only used the scrub on my feet. When I was done I told Tom, “My feet smell like a margarita!”
DIY Milk Foot Soak
Posted by MarleyJustine in DIY, DIY Beauty on July 26, 2013
Who has super soft feet right now? I do! Would you like moisturized, super soft feet too.
Pour 1-2 cups of milk and 1-2 tbsp of extra virgin olive oil into your bathtub or a large bowl. Add enough hot water to completely cover your feet.
Soak your feet in the mixture for 20-30 minutes. Be sure to enjoy this time. Put on an episode of your favorite television show, read a book or magazine, listen to music or read a blog. Or, treat yourself a little more. Combine this DIY Face Mask using banana, lemon juice and honey or this DIY Oatmeal Face Mask; brighten your nails; or try this DIY Hair Mask.
After you have finished soaking your feet and you have dried them completely finish with your favorite moisturizer. I like to hold in the moisture with this DIY toe-less sock.
I hope you enjoy this DIY Foot Soak. If you try it, please feel free to leave a comment below letting me know how you liked it. I would also love to hear what your favorite foot soak is! Is it a DIY? I’m always looking for new DIY projects to try!
As always, thank you so much for visiting my blog and for reading this post. If you have any suggestions for future blog posts please let me know.
Marley
Related articles
- DIY Your Feet for their natural beauty!!! (ellapurebenatural.wordpress.com)
- Relaxing Foot Soak for Achy Feet (beautyblunders.wordpress.com)
- Foot Soak (instylefashionone.com)
- Cinnamon Hand and Foot Soak (beautyblunders.wordpress.com)
- DIY: Refreshing Mint Foot Scrub (makeupnalotmore.wordpress.com)
DIY Lip Color
Posted by MarleyJustine in DIY, DIY Beauty on July 9, 2013
Sitting in the living room in front of the open balcony doors enjoying the warm breeze and sunshine I was hit with the urge to make a DIY lip color! There are many DIY lip products that are time intensive and costly. I decided I wanted to do a very basic lip color – one that didn’t have me reaching for the credit card or leaving the house!
If you are interested in more ‘advanced’ (for lack of better words) DIY lip products please let me know either by e-mail or by leaving a comment. I do have some planned for the future but I can bump them to an earlier date if requested, and your feedback is always appreciated.
So, let’s get to today’s DIY:
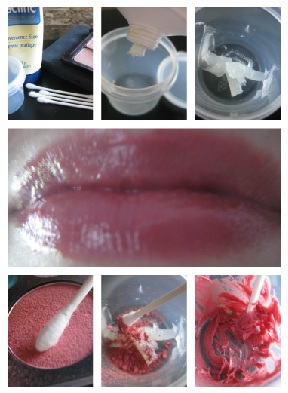
For this basic DIY lip color you are going to need Vaseline, Q-Tips (or something similar), a small airtight container (lip balm pot, contact case, etc…) and either eyeshadow or blush.
Start by squeezing (or scooping) the desired amount of Vaseline into your container. As you can see, I only used a small amount – I was unable to find a smaller container.
I used a Q-Tip to scrape the blush I chose for this, then I pushed the loose blush into the container with the Vaseline and stirred it for about a minute with the same Q-Tip. After stirring you may wish you add more blush (or eyeshadow) to get more color. I was happy with mine and skipped this step.
This is a great way to put old eyeshadow and lip balm pots to use, as well as to use up old eye shadow and blush.
I will definitely be repeating this DIY in the future. Next time I do this I would like to do more with it, whether it is in the lip color itself or the packaging and presentation. Be sure to check back to see what changes I make to this!
If you give this DIY a try I would love to see or hear about your results so please feel free to leave a comment or send me an e-mail.
As always thank you for reading. I hope you’ll spread the word and check back again soon!
Marley
Vertigo, Chocolate Pie & Today’s Face
Posted by MarleyJustine in Beauty, Food & Drink, Me, Products on July 5, 2013
Lately, as a result of an inner ear infection I have been experiencing vertigo. I am doing my best to not complain, but let’s face it, it is not fun. For me, the most difficult part was being told I was not allowed to drive for a few weeks. However, I understand the reasoning behind this – safety first. Last night, while trying to get comfortable in a position that did not trigger ‘the dizzies’ (is that even a word?) I decided more than anything I wanted to make chocolate pie. I had the pie shell (pie crust?) and the chocolate pudding mix, I just hadn’t gotten around to making the pie.
Sometimes I am able to talk myself out of decisions I make while falling asleep. For example, right after deciding to make the chocolate pie I decided to mop the floors -I quickly excused myself from that chore when I woke up this morning.
I am glad I made the chocolate pie this morning. It was nice to switch up my morning routine and it makes my morning sound more productive than it was, especially if I leave out the word chocolate. “By ten o’clock this morning I had the dog walked, laundry started and I made a pie!” – See what I mean? 😉
DIY: Shine Boost for Hair
Posted by MarleyJustine in DIY, DIY Beauty, Tips & Tricks on June 28, 2013
The last time I had my hair trimmed I was given this tip for getting a healthy shine to my hair, and I have finally gotten around to trying it. If your hair could use a little extra shine, give this a try. I’m glad I did!
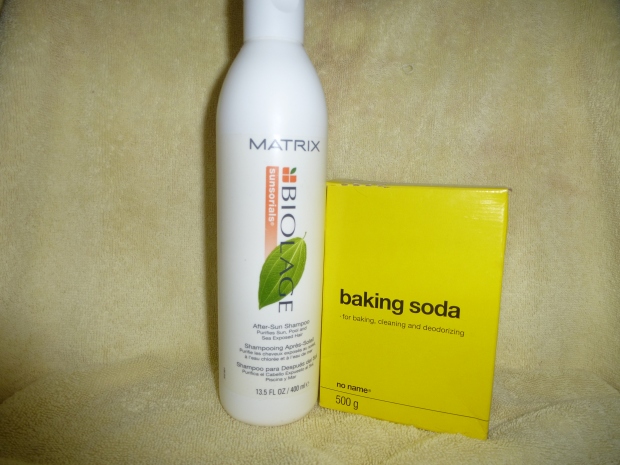
Prior to getting in the shower combine your regular amount of shampoo with a dash of baking soda in a bowl and give it a quick mix.
In the shower use the baking soda and shampoo mixture the same way you would use your shampoo on any given day. I was told to repeat this no more than once a week.
On top of giving your hair a healthy shine the baking soda is also supposed to help remove the build up of excess hair product!
As I said, I am happy with the results but I would love to hear from other people who have tried it – what do you think? Was anyone unhappy with the results?
To all my fellow Canadians, I hope you have a fantastic long weekend. I’m keeping my fingers crossed that this Canada Day weekend brings some nicer weather.
Thank you for reading and I hope you’ll check back. I do not anticipate the next post will be until next Wednesday.
Marley
A DIY Face Mask for Oily Skin
Posted by MarleyJustine in Beauty, DIY, DIY Beauty on June 27, 2013
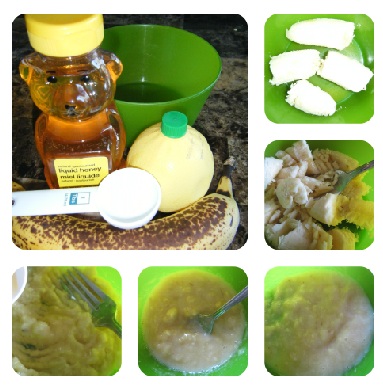
Let’s get straight to today’s DIY face mask:
- Ripe banana (1)
- Lemon juice (1 tbsp)
- Honey (1 tbsp)
- Dash of sea salt (optional)
Mash the banana in a bowl, then add 1 tbsp of lemon juice and 1 tbsp of honey. Mix well.
Apply the mixture to your face and allow it to sit for 15-20 minutes. Wash off with warm water.
Sorry for such a quick post. I promise I’ll make it up to you in future blog posts. Does anyone have any suggestions for future blog posts? Let me know, I would love to hear from you!
Marley
DIY Oatmeal Face Mask
Posted by MarleyJustine in DIY, DIY Beauty on June 14, 2013
If you’re looking for a way to exfoliate your skin while absorbing excess oils, look no further than your kitchen, or at the very least, the closest grocery store.
This mask calls for two ingredients – lemon juice and plain instant oatmeal.
In a bowl, combine 1 cup of instant oatmeal with just enough lemon juice to form a paste. Using your fingers, apply the mixture to your face, massaging lightly to exfoliate. Once you have applied the oatmeal face mask, sit back and allow it to dry completely, then rinse well with warm water.
The first time I tried this mask I applied a very thick layer to my face and it took forever to dry – a thin layer is all you need.
I am always looking for new DIY face masks to try. If you have any suggestions please leave it as a comment or send me an e-mail. If you have a tutorial on your blog that you would like me to use the post will include a link to your blog.
DIY: Banana and Avocado Hair Mask
Posted by MarleyJustine in DIY, DIY Beauty on June 12, 2013
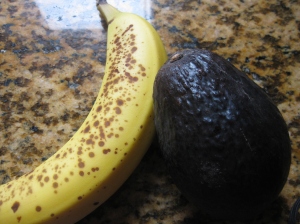
Are you looking to put an avocado and a banana to good use? I was, and I crossed my fingers as I mixed the two together that this would work. I could have sworn that months ago I had saved the information, either on my computer or in my journal, for a similar hair mask. Unable to find it, I assumed it would be fine as I have definitely seen both of these ingredients used in other hair masks before.
This is as simple as combining a banana and an avocado together in a bowl and mashing. I cut both into smaller pieces before I began mashing. It wasn’t difficult, but next time I think I’ll use my Magic Bullet.
Before I began, I took a shower and washed my hair. I used a towel to squeeze excess water out but it was still quite damp. Immediately before applying the hair mask, I used a comb to get any tangles out, and I draped a towel over my shoulders/around my neck, then using my fingers, I combed the mixture through my hair.
The last time I used a conditioning hair mask I left it on for 20 minutes, so I did the same with this. After 20 very relaxing minutes, after all, there’s not much you can do with banana and avocado in your hair, I rinsed my hair in the shower and dried as usual.
Success! My hair is super soft, and it smells amazing!
Give your lips a little TLC
Posted by MarleyJustine in Beauty on June 9, 2013
Are your lips in need of a little TLC? Try one of my favorite lip routines and in a week, enjoy smoother, softer lips.
In my experience, lips seem to get neglected in the summer, and are more of a priority in the winter, especially if you have particularly cold winters! However, I have decided to do this post in the summer. After all, we seem to focus on every other part of our body this time of year.
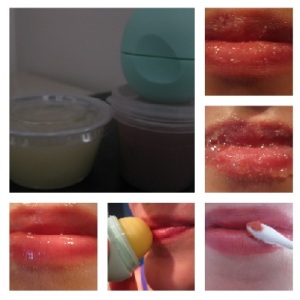
Start with the lime and honey lip scrub that I previously posted, or any other lip scrub. Each night for a week (or longer – I try to use lip scrub every night), massage your lips for a minute or two using the lip scrub and your finger. Remove the lip scrub – if you’re using the lime and honey lip scrub don’t forget that it is edible, so you’re able to lick it off! After using the lip scrub, apply a layer of lip balm. Lately I have been using a DIY lip balm right before bed. Eventually I will get around to posting a DIY tutorial for it!
As soon as I wake up in the morning I like to apply another layer of lip balm. Try to squeeze a quick application of lip balm into your morning routine. Throughout the day keep your lips moisturized with multiple applications of your favorite lip balm. One of my favorites that I have been using a lot is EOS Sweet Mint.
Check your daily lip routine – do you use a lip product with an SPF? Incorporating this into your lip routine is beneficial, not only for smoother, softer lips, but to avoid the pain of having sun-burnt lips! Ouch.
This lip routine is quick and easy. Don’t stop when the week is up – use regularly to maintain your results!
