Archive for category Tips & Tricks
Blackheads and Baking Soda
Posted by MarleyJustine in DIY, DIY Beauty, Tips & Tricks on August 12, 2013
Nobody likes blackheads. Unfortunately, blackheads are common, especially if you have oily skin. Of course, there are a number of products available to help combat blackheads – you’ve probably heard of them, maybe you have tried them and maybe you have even had success with them. If you are looking for a budget-friendly way to help combat blackheads, or if you simply enjoy DIY home remedies, try beating blackheads with baking soda!
Mix 2.5 tbsp of baking soda with 2-2.5 tbsp water. The two should form a paste. If your mixture is slightly runny, that is okay. However, if you wish to thicken it, simply add more baking soda.
Apply the mixture to the areas of your face where blackheads are present and gently massage using your fingers for about two to three minutes. Rinse your face with warm water and pat dry.
Clean Make Up Brushes!
Posted by MarleyJustine in Tips & Tricks on August 2, 2013
Hello everybody,
After spending the week studying and writing my exam yesterday afternoon I really wanted to enjoy today. I still have a busy couple of weeks before I take some time to go visit my family, celebrate my birthday and lounge by the pool (I’m keeping my fingers crossed for nice weather). As wonderful as it would be, I know I am unable to spend today doing absolutely nothing. I am determined to make some time to work on a couple of future blog posts and do some writing and possibly editing.
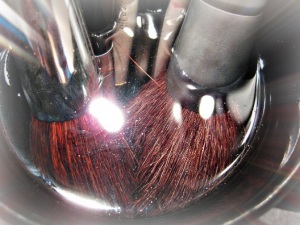
I did manage to accomplish one thing this morning – I finally got around to cleaning my make up brushes! I have three methods that I typically alternate between when I clean my make up brushes. Of the three, this method is probably the least expensive and the easiest.
Step 1: Fill a mug or glass approximately half way with hot water.
Step 2: Add 2-3 tbsp of white vinegar to the water. Vinegar has been used for years in cleaning. It is especially popular in ‘green cleaning.’
Step 3: Soak your make up brushes in the water and vinegar mixture for 20-30 minutes.
Step 4: Rinse each brush with hot water.
Step 5: Rinse each brush with cool water.
Step 6: Pat each brush dry to remove any excess water.
Step 7: Air dry. I lay my brushes on a clean hand towel while they air dry.
This method is quite common when it comes to cleaning make up brushes. I will be posting the other two methods I use when cleaning make up brushes in the future. With this method, you may need to adjust the length of time you allow your brushes to soak. I have soaked mine for up to four hours before. Once because I forgot about them and another time because they were stained blue after I did my make up for a Halloween party.
I am off to find a balance between relaxation and productivity. Be sure to let me know if you have any suggestions or requests for future blog posts.
Enjoy your day and I hope you check back soon,
Marley
DIY: Shine Boost for Hair
Posted by MarleyJustine in DIY, DIY Beauty, Tips & Tricks on June 28, 2013
The last time I had my hair trimmed I was given this tip for getting a healthy shine to my hair, and I have finally gotten around to trying it. If your hair could use a little extra shine, give this a try. I’m glad I did!
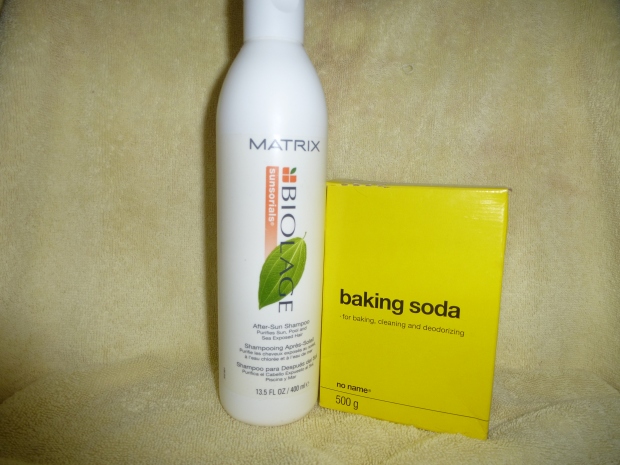
Prior to getting in the shower combine your regular amount of shampoo with a dash of baking soda in a bowl and give it a quick mix.
In the shower use the baking soda and shampoo mixture the same way you would use your shampoo on any given day. I was told to repeat this no more than once a week.
On top of giving your hair a healthy shine the baking soda is also supposed to help remove the build up of excess hair product!
As I said, I am happy with the results but I would love to hear from other people who have tried it – what do you think? Was anyone unhappy with the results?
To all my fellow Canadians, I hope you have a fantastic long weekend. I’m keeping my fingers crossed that this Canada Day weekend brings some nicer weather.
Thank you for reading and I hope you’ll check back. I do not anticipate the next post will be until next Wednesday.
Marley
The Perfect “Summer Nights” Sock (Hold in the Moisture)
Posted by MarleyJustine in DIY, Tips & Tricks on June 20, 2013
Has anyone picked up on the title of the post? What was I watching while I cut the toes off my socks? If you guessed Grease, you’re right! If you’re not in the mood to watch the entire movie, at least watch “Summer Nights” on YouTube. Would you believe me if I said singing along helps?
Applying lotion to my heels is one of the last things I do each night before heading to bed.Living in Atlantic Canada most of the year I am happy to follow this application with a pair of socks (though in my adult life I can probably count the number of times on one hand that I have gone to bed with socks and woken up still wearing them). However, from late spring/early summer to early fall I can’t stand the thought of wearing socks to bed. Fortunately, I found this link while browsing Pinterest. Isn’t Pinterest fantastic? Anyway, immediately after finding this I went in search of socks and scissors!
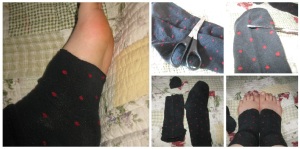
This is as simple as it looks – cut the toes off of a pair of cotton socks. After applying lotion to your heels before bed slip these socks on to hold in the lotion.
Am I the only one who thinks these are absolutely adorable?
Baseboards and Dryer Sheets!
Posted by MarleyJustine in Cleaning, Home & Garden, Tips & Tricks on June 13, 2013
Have any of you tried using dryer sheets to dust your baseboards? I heard about this a while ago but only thought to try it recently.
On top of picking up the dust that is on your baseboards this method apparently also helps prevent dust from sticking to your baseboards.
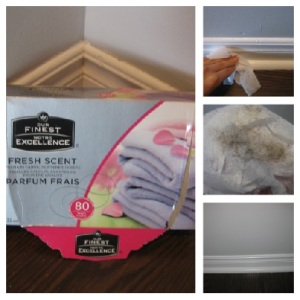
I had a box of generic dryer sheets that I had picked up on sale at Wal-Mart and used mainly for sticking in closets, garbage cans, dressers, etc… and I decided to use those to try this out.
I wiped the baseboards on our main floor, as well as all of the trim going upstairs. Because I have only recently done this I cannot say for sure whether or not this method is successful in preventing dusty baseboards, but I am very pleased with how well the dryer sheets picked up dust. I also enjoy the subtle scent this method left behind.
For those who have tried this method, I’d love to hear what you thought of it!!
Marley
“Bedhead” Brows
Posted by MarleyJustine in Beauty, Tips & Tricks on June 13, 2013
Brow problems? Perhaps you’re waiting for an appointment to get them waxed, and it just can’t come soon enough, or maybe you are busier than ever and haven’t found the time to book an appointment. There’s a chance you’ve over-plucked and you’re worried that if you try to fix them you’ll only make them worse. Or maybe you just have wild brows!
I don’t know what I did to my brows but lately I have been describing them as “bedhead brows” (sorry, no pictures). Since I will be seeing my mother soon I have decided to suffer through whatever is currently going on with my eyebrows – my mother is the ‘Queen of Eyebrows’. Seriously, she set the bar high and nobody else does my eyebrows as well as she does. For now, I have found a quick and easy way to cope with these crazy brows of mine…
…Hair gel! It is as simple as that. I have been using a small amount of hair gel on each brow as part of my morning make up routine. It works like a charm, however, it is a temporary fix, I am still very eager to see my mother.
Before bed, I gently wash the hair gel out of my eyebrows using warm water Dove soap. I say gently because I don’t want to mess up my brows anymore than I already have!
Care to share your brow advice?
Reviving Dried Out Mascara!
Posted by MarleyJustine in Tips & Tricks on May 28, 2013
I must have been distracted yesterday while applying my make up because when I opened my make up bag this morning I found the top of my mascara was just barely screwed on. I didn’t have to pull the wand up very far to know that it had dried out. It probably doesn’t help that I pump my mascara wand frequently, and this particular tube is approaching the three month mark. However, just as I was about to throw it out, I decided to make an attempt to save it:
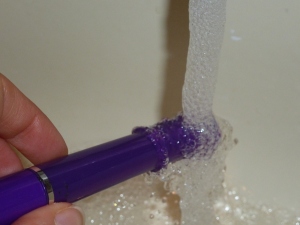
I secured the cap tightly on the tube of mascara, then, remembering my last attempt at screwing on the cap, I double checked it. Then, I held the bottom of the tube under running hot water for a little over two minutes. It worked like a charm!
Remember: “They” advise that you don’t keep your mascara for more than three months due to bacteria growth.
Confession: I have a six month old tube of mascara that I still use!
Marley
