Posts Tagged Beauty
New Phone & Today’s Face
Posted by MarleyJustine in Beauty, Me, Products on August 14, 2013
Goodbye Blackberry, hello iPhone – Yesterday, I said goodbye to my Blackberry Curve and decided to join the Apple world. So far, I am happy with my decision, however, I am having a slight problem with FaceTime – the connection drops when I try to do a video call. Hopefully that is an easy fix. As much as I would love to spend the day playing around with my new phone, I should probably tackle the day’s to-do list, or at least put a dent in it, first. Feel free to leave a comment letting me know of any ‘must have’ apps. And if anyone knows how to fix my FaceTime problem, I’d certainly love to hear from you! Any other iPhone advice is also appreciated.
I thought I would do another ‘Today’s Face’ post. If you missed the first one, click here to view it.
Primer – I started with a light application of my DIY primer. If you like DIY beauty products and you have not tried this, I highly recommend it.
Foundation – Cover Girl NatureLuxe Liquid Silk Foundation (320). I picked this foundation up after reading a couple of positive reviews about it. One of my favorite liquid foundations is Revlon PhotoReady and I have a tendency to compare new foundations to that one. Compared to Revlon PhotoReady, Cover Girl NatureLuxe is not as heavy and while that is not necessarily a bad thing, I find it takes a while to get use to it.
After applying my foundation I applied a DIY bronzer (not pictured). I will be posting this DIY bronzer to the blog in the future. Be sure to check back for that!
Eyeliner: Maybelline New York Unstoppable Eyeliner in Onyx. I love this eyeliner but I do find it can be difficult to remove, but then again it is smudge-proof and water-proof. It is also a little heavier than other eyeliners.
Eyeshadow: Expert Wear- Amethyst Smokes by Maybelline New York. I have really been enjoying purples this summer.
Mascara: Cover Girl Professional all-in-one Mascara in ‘Very Black’. I have said it before and I’ll say it again, I love this mascara because of the natural looking results.
Lipstick/Lip Gloss: I opted to play up my eyes today but I did not want to ignore my lips completely. I am wearing Avon’s Shine Attract Lipstick in Rose Pink (P03). It is quite subtle but provides just enough shine and tint to complete today’s look!
Thank you so much for reading today’s blog post and for checking out the blog. Feel free to comment leaving a link to your most recent “Today’s Face” post!
Marley
Related articles
- Simple, Everyday Makeup Look (fashionfaves44blog.wordpress.com)
- Requested! Vanity Tour: (estycare.wordpress.com)
- An Everyday Summer Makeup Look (bottledhollywood.wordpress.com)
Today’s Favorite Amazon Finds:
Blackheads and Baking Soda
Posted by MarleyJustine in DIY, DIY Beauty, Tips & Tricks on August 12, 2013
Nobody likes blackheads. Unfortunately, blackheads are common, especially if you have oily skin. Of course, there are a number of products available to help combat blackheads – you’ve probably heard of them, maybe you have tried them and maybe you have even had success with them. If you are looking for a budget-friendly way to help combat blackheads, or if you simply enjoy DIY home remedies, try beating blackheads with baking soda!
Mix 2.5 tbsp of baking soda with 2-2.5 tbsp water. The two should form a paste. If your mixture is slightly runny, that is okay. However, if you wish to thicken it, simply add more baking soda.
Apply the mixture to the areas of your face where blackheads are present and gently massage using your fingers for about two to three minutes. Rinse your face with warm water and pat dry.
Clean Make Up Brushes!
Posted by MarleyJustine in Tips & Tricks on August 2, 2013
Hello everybody,
After spending the week studying and writing my exam yesterday afternoon I really wanted to enjoy today. I still have a busy couple of weeks before I take some time to go visit my family, celebrate my birthday and lounge by the pool (I’m keeping my fingers crossed for nice weather). As wonderful as it would be, I know I am unable to spend today doing absolutely nothing. I am determined to make some time to work on a couple of future blog posts and do some writing and possibly editing.
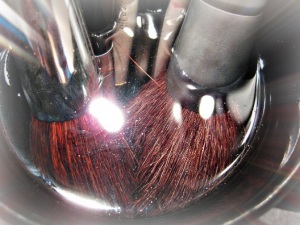
I did manage to accomplish one thing this morning – I finally got around to cleaning my make up brushes! I have three methods that I typically alternate between when I clean my make up brushes. Of the three, this method is probably the least expensive and the easiest.
Step 1: Fill a mug or glass approximately half way with hot water.
Step 2: Add 2-3 tbsp of white vinegar to the water. Vinegar has been used for years in cleaning. It is especially popular in ‘green cleaning.’
Step 3: Soak your make up brushes in the water and vinegar mixture for 20-30 minutes.
Step 4: Rinse each brush with hot water.
Step 5: Rinse each brush with cool water.
Step 6: Pat each brush dry to remove any excess water.
Step 7: Air dry. I lay my brushes on a clean hand towel while they air dry.
This method is quite common when it comes to cleaning make up brushes. I will be posting the other two methods I use when cleaning make up brushes in the future. With this method, you may need to adjust the length of time you allow your brushes to soak. I have soaked mine for up to four hours before. Once because I forgot about them and another time because they were stained blue after I did my make up for a Halloween party.
I am off to find a balance between relaxation and productivity. Be sure to let me know if you have any suggestions or requests for future blog posts.
Enjoy your day and I hope you check back soon,
Marley
Empties and Friday’s Favorites
Posted by MarleyJustine in Products on July 12, 2013
Happy Friday! I hope all of you have exciting plans for the weekend. If you do not, feel free to hang around the blog all weekend leaving comments, I would love to make it more interactive. If you have any suggestions for making the blog more interactive please let me know, I would really appreciate it!
Now, let’s get to today’s two part post: empties and favorites!
“Bedhead” Brows
Posted by MarleyJustine in Beauty, Tips & Tricks on June 13, 2013
Brow problems? Perhaps you’re waiting for an appointment to get them waxed, and it just can’t come soon enough, or maybe you are busier than ever and haven’t found the time to book an appointment. There’s a chance you’ve over-plucked and you’re worried that if you try to fix them you’ll only make them worse. Or maybe you just have wild brows!
I don’t know what I did to my brows but lately I have been describing them as “bedhead brows” (sorry, no pictures). Since I will be seeing my mother soon I have decided to suffer through whatever is currently going on with my eyebrows – my mother is the ‘Queen of Eyebrows’. Seriously, she set the bar high and nobody else does my eyebrows as well as she does. For now, I have found a quick and easy way to cope with these crazy brows of mine…
…Hair gel! It is as simple as that. I have been using a small amount of hair gel on each brow as part of my morning make up routine. It works like a charm, however, it is a temporary fix, I am still very eager to see my mother.
Before bed, I gently wash the hair gel out of my eyebrows using warm water Dove soap. I say gently because I don’t want to mess up my brows anymore than I already have!
Care to share your brow advice?
DIY: Banana and Avocado Hair Mask
Posted by MarleyJustine in DIY, DIY Beauty on June 12, 2013
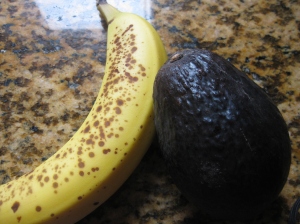
Are you looking to put an avocado and a banana to good use? I was, and I crossed my fingers as I mixed the two together that this would work. I could have sworn that months ago I had saved the information, either on my computer or in my journal, for a similar hair mask. Unable to find it, I assumed it would be fine as I have definitely seen both of these ingredients used in other hair masks before.
This is as simple as combining a banana and an avocado together in a bowl and mashing. I cut both into smaller pieces before I began mashing. It wasn’t difficult, but next time I think I’ll use my Magic Bullet.
Before I began, I took a shower and washed my hair. I used a towel to squeeze excess water out but it was still quite damp. Immediately before applying the hair mask, I used a comb to get any tangles out, and I draped a towel over my shoulders/around my neck, then using my fingers, I combed the mixture through my hair.
The last time I used a conditioning hair mask I left it on for 20 minutes, so I did the same with this. After 20 very relaxing minutes, after all, there’s not much you can do with banana and avocado in your hair, I rinsed my hair in the shower and dried as usual.
Success! My hair is super soft, and it smells amazing!
Give your lips a little TLC
Posted by MarleyJustine in Beauty on June 9, 2013
Are your lips in need of a little TLC? Try one of my favorite lip routines and in a week, enjoy smoother, softer lips.
In my experience, lips seem to get neglected in the summer, and are more of a priority in the winter, especially if you have particularly cold winters! However, I have decided to do this post in the summer. After all, we seem to focus on every other part of our body this time of year.
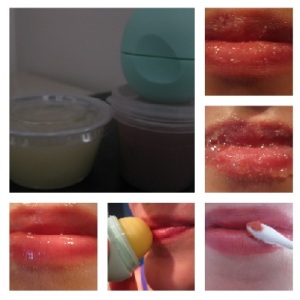
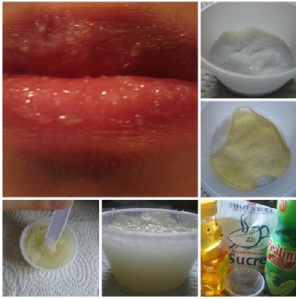
Start with the lime and honey lip scrub that I previously posted, or any other lip scrub. Each night for a week (or longer – I try to use lip scrub every night), massage your lips for a minute or two using the lip scrub and your finger. Remove the lip scrub – if you’re using the lime and honey lip scrub don’t forget that it is edible, so you’re able to lick it off! After using the lip scrub, apply a layer of lip balm. Lately I have been using a DIY lip balm right before bed. Eventually I will get around to posting a DIY tutorial for it!
As soon as I wake up in the morning I like to apply another layer of lip balm. Try to squeeze a quick application of lip balm into your morning routine. Throughout the day keep your lips moisturized with multiple applications of your favorite lip balm. One of my favorites that I have been using a lot is EOS Sweet Mint.
Check your daily lip routine – do you use a lip product with an SPF? Incorporating this into your lip routine is beneficial, not only for smoother, softer lips, but to avoid the pain of having sun-burnt lips! Ouch.
This lip routine is quick and easy. Don’t stop when the week is up – use regularly to maintain your results!
Clean & Clear Essentials Deep Cleaning Astringent for Sensitive Skin
Posted by MarleyJustine in Products on June 9, 2013
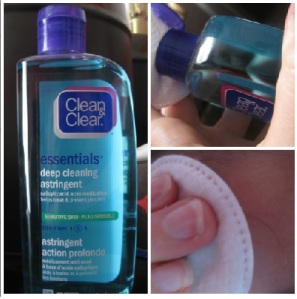
Lately I have been using ‘Clean & Clear Essentials Deep Cleaning Astringent for Sensitive Skin.’ I actually picked this product up by mistake. Usually, I don’t purchase products for sensitive skin. however, it was on sale and we were in a rush, so without hesitation, I threw it in the cart.
I have been using this first thing in the morning before applying any other product to my face for the day. As well, I use this after washing my face before going to bed. Periodically, I follow the nighttime application with a moisturizer, but it does not seem necessary, there has been no indication that the product is drying my skin out.
Since it is made for sensitive skin, the product is noticeably more gentle than other deep cleaning astringents I have used in the past. Compared to these products, it also has a very light smell.
This is by no means a miracle product, but it does what it is supposed to do. It is an additional step to include in your beauty routine to help prevent future break outs, and help combat current ones.
Based on my experience with this product, I will happily try more products not only for sensitive skin, but also more products from Clean & Clear in the future.
For more information on Clean & Clear check out their website: http://www.cleanandclear.ca/
Lime and Honey Lip Scrub
Posted by MarleyJustine in DIY, DIY Beauty on June 2, 2013
This is surprisingly one of my favorite lip scrubs, I say ‘surprisingly’ because I do not like honey. I guess I am too focused on the results to care about the ingredients. For those of you who do like honey, this recipe is completely edible. I heard about it from a friend of mine, and every time she uses this, she licks it off her lips.
You will need a small glass or plastic container with a lid. If you enjoy making products like this start saving lip balm and eye shadow pots. You can also buy suitable containers if you don’t already have some. I purchased the container I used on sale from CanWax.
Aside from a container with a lid, all you’re going to need to make this is sugar, honey and lime juice.
In your container, combine equal parts honey and sugar, then add slightly less lime juice. If you wish to thicken the product to get more of a scrub, add more sugar. Stir well. If the product starts to separate between uses, give it another quick stir.
Store your lip scrub at room temperature in your lidded container and use once or twice a day. When using, massage onto your lips with your finger and continue to massage for a minute or two.

